
思路:用Elementor Pro製作產品詳情頁範本(single product)和詢盤表單彈出層(popup),在產品詳情頁範本上添加一個詢盤按鈕,將按鈕鏈接設置為dynamic調用popup即可。
注意,不要將Ninjaform、Wpforms、contact form7製作的表單放到Elementor的Popup中,會出錯:無法顯示表單或無法提交表單。
2021/5/12更新,最新的elementor pro提供了submissions功能以記錄詢盤,可以不用安裝elementor contact form DB了。
視頻教學
視頻教學中用到的是Neve主題免費版提供的免費購物網站範本,安裝了外掛Elementor、Elementor pro、 Elementor Contact Form DB 。
圖文教學
下面這篇圖文教學是我在製作B2B架設企業網站教學時的用到的,用在我的範本站上的,並且,我將詢盤表單元素做成了全域通用的Global元素,譬如點擊按鈕彈出詢盤表單的popup、聯繫我們頁面的表單都共用同一個詢盤表單,避免重複工作量。
具體操作步驟如下:
- 配置發件郵箱帳號,在wordpress後台安裝SMTP外掛程式並設置發件功能
- 安裝外掛程式
Elementor、Elementor pro 並啟用 - 在WordPress後台,進入templates> popup,點擊add new,添加新的popup

- 進入popup編輯頁面后,可按需導入範本,或直接關閉範本頁面自行製作
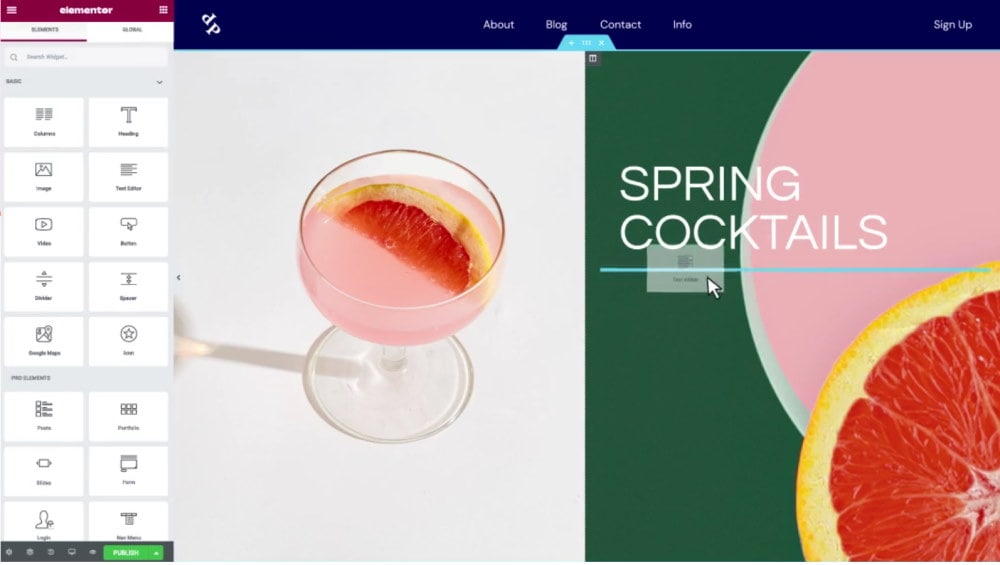
- 將heading和form元素加入到頁面,如下圖所示

6.設置需要用戶必須填寫的欄位,並顯示*標記; 你也可以在左側新增欄位,預設情況下是name、email、message三個字段,建議欄位不要過多,降低使用者填寫難度,還可以添加一個honeypot欄位,這個字段不會出現在頁面上,只會出現在代碼里,用於避免一些垃圾郵件。

7.將調整完畢的form元素右鍵存儲為Global元素,以便於在其他地方重複使用

8.發佈表單,並將條件設為全站,保存即可,不需要設置其他(triggers或advanced rules)。 PS:如果你想設置詢盤表單在某些條件下自動彈出,譬如使用者流覽兩頁后彈出,可以設置triggers和advanced rules。

9.如果需要在產品頁面點擊詢盤按鈕時彈出詢盤表單,請在elementor中添加single product產品詳情頁範本,在範本中添加詢盤按鈕,然後在左側按鈕設置中,點擊link 右側的dynamic 按鈕(圖中的2),在下拉選項中選擇popup,然後繼續點擊popup,在setting中搜索並選中剛才添加的popup


10.此時,點擊詢盤按鈕,將可見到詢盤彈出視窗

11.我們在任一產品頁面提交詢盤進行測試,查看是否能收到詢盤郵件通知以及後台是否記錄,詢盤郵件將發送到你的wordpress帳戶郵箱裡,如需添加收件郵箱,請在詢盤表單中進行配置,多個郵箱之間用英文逗號間隔即可。 同時,在此處也能設置通知郵件的標題、正文。

在發完測試詢盤後,我們查看郵箱是否收到郵件(注意檢查垃圾郵箱),同時在後台的Elementor》Submissions頁面查看詢盤記錄,如下圖所示,大功告成。